


Upon first launch, Remote Desktop Manager uses a local SQLite data source. The different data sources are listed in Data source types. For help selecting a data source tailored to your needs, please see our Getting started section.
Once you have identified your needs, you can proceed with the creation of your first data source:
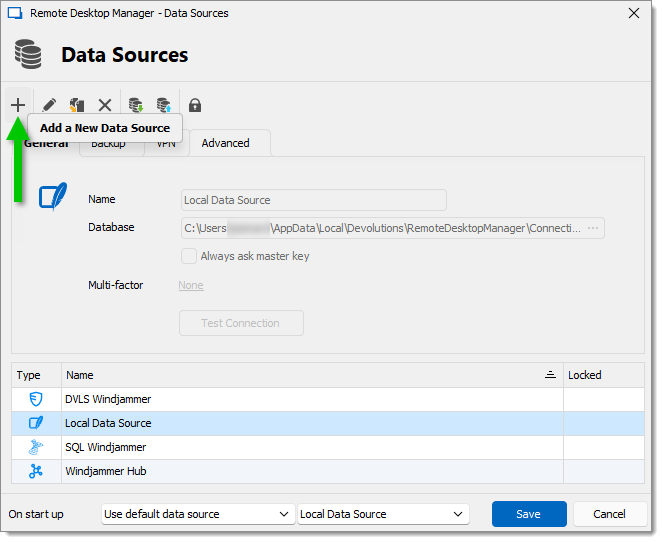
- In Remote Desktop Manager, go to File – Data sources.
- Click on Add a new data source.
Add a new data source - Select the type of data source to create, then click Add. In the example below, a Devolutions Server data source is being created.

Data source type selection - Configure the data source connection settings. To validate the information, click on Test connection or Test host depending on the type of data source being created.
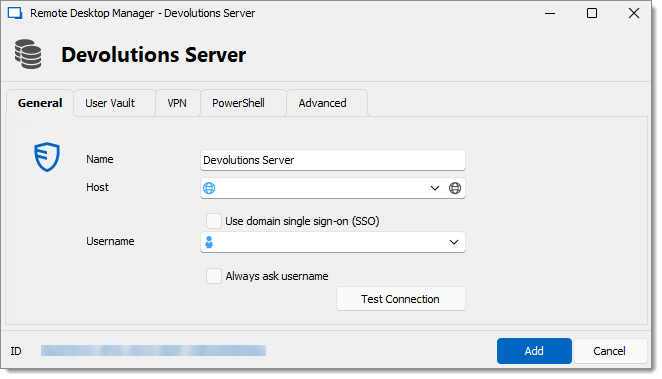
Data source configuration - Click Add when the configuration is complete.
- Once created, the new data source should automatically open. You can also manually open the data source by selecting it from the data source drop-down list at the top of the Navigation pane.
You may have to add a license to your data source. If you are using an advanced data source, there is no need to add a license in Remote Desktop Manager as the license serial is retrieved directly from the data source.